Hair Accessories
Sew Along With Us

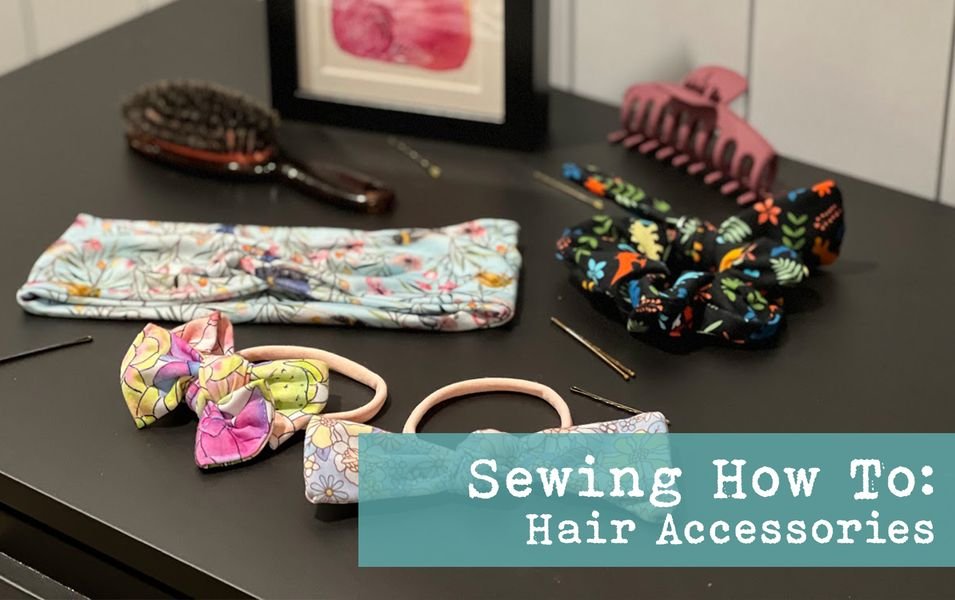
Another day another tutorial. This time we’re tackling a bunch of different hair accessories! So, first up we have…
Knotted Bow on Nylon Band
What you need:
- Fabric (woven or stretch)
- Nylon Band (I shopped them here)


How to:
First up, cut your fabric into 2 rectangles approximately 25cm x 10cm (you can certainly make this smaller or bigger depending on what end bow you want). With the good sides together, sew around the 4 sides, leaving a turning hole in the middle


Turn right side out and top stitch the turning hole closed

Taking the nylon band, place it in the middle of the fabric and knot the fabric around it.
Shuffle it around to have the knot sit nicely on the band.

Bow on Nylon Band
What you need:
- Fabric
- Nylon band (shop here)
How to:
Cut out your cotton lycra and fold with good sides together, sew down the long side to create a tube Flip it to be the right side out and then fold the ends in and top stitch in place

Lay flat on the table and place the nylon band into the middle of the fabric. Create an M shape with the fabric in your hands, as if you are about to tie a bow in your shoelaces. Making sure you place your finger in where the nylon band is to hold everything together until you are ready to pull tight on the bow.


Continue with this bow tieing motion where you cross the loop of the fabric over the other, around the ‘tree’ and through the ‘hole’. To essentially create a messy little bow.

Neaten the bow by adjusting the loops and the ends until you are happy with the final shape. Make sure the nylon band is sitting nicely in the back, shift it around if you need to.

Twisted Headband


What You Need:
- Stretch fabric (20cm x 50cm)

How to make it:
After cutting your stretch fabric into a rectangle (20cm x 50cm), fold it over with the good sides together and long sides together. Sew down the long side leaving the ends open

Flip through so that the right side is out. Fold the rectangle in half so that the short sides are together Shift the top half down so that its only overlapping about half way

Take the bottom overhang piece and fold it over the opposite piece. So that your headband should look something like this (all twisted) Then repeat it with the top overhang piece

Sew these raw ends together


Now open up your headband, making sure that the sewn part is on the inside.


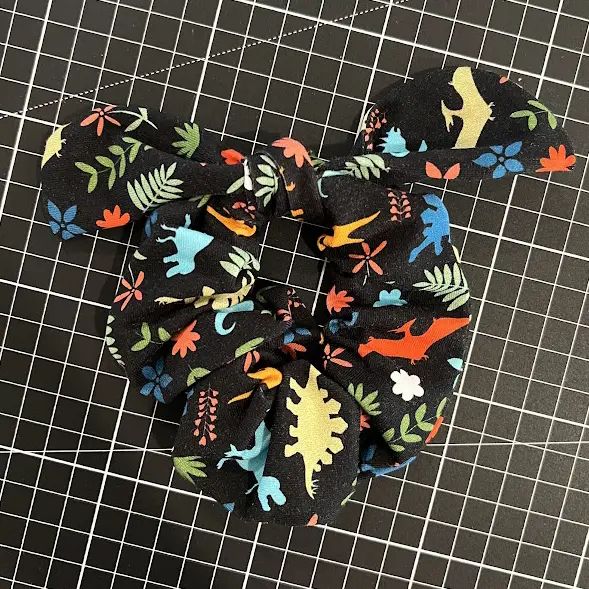
Bunny Eared Scrunchie
What You Need:
- Fabric (woven or stretch works) 40cm x 10cm and 23cm x 10cm
- 17cm of 1/4″ Elastic

How to:
Cut out the fabric to two rectangles (45cm x 10cm) and (23cm x 10cm) Take the larger of the two rectangles and fold in half good sides together with the long sides together. Sew this into a tube Flip tube through so that the good side is facing out Take your elastic, and feed it through the tube, keeping a hold of one end so it doesn’t disappear back into the scrunchie.

With both ends together, sew together and allow to feed back into the fabric tube
Folding over one raw edge of the fabric, feed the other end inside so that no raw edges are exposed Sew in place Put aside for now

Taking the smaller rectangle, fold it in half with the good sides together, and sew along a line similar to this, ensuring you leave a turning hole


Flip out to be the right way around (don’t worry about closing off the turning hole, this will disappear into the knot in a second) just make sure that the raw edges are tucked in nicely
Tie this around the scrunchie and knot in place