

Micro Wetbag
Sew Along With Us

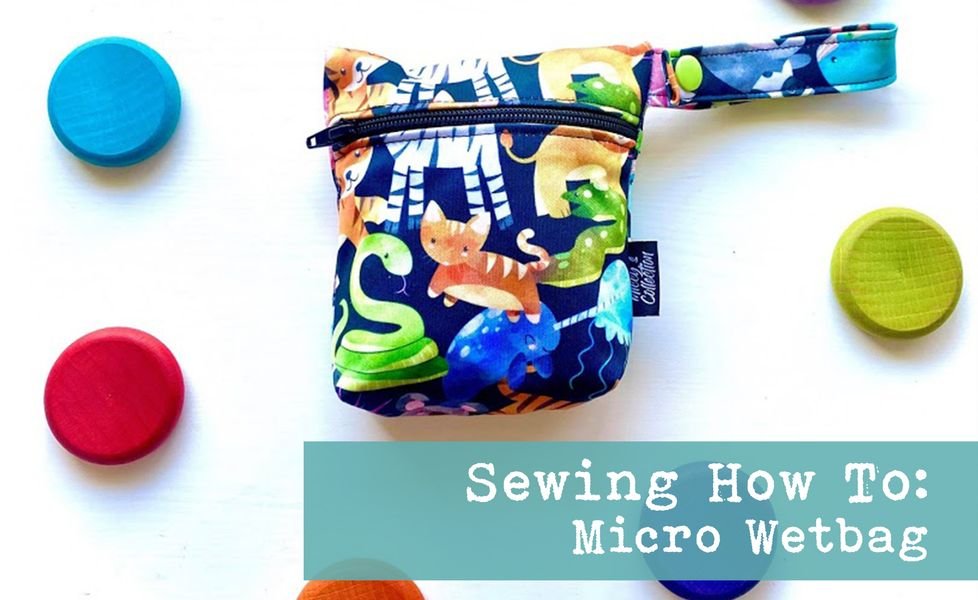
Do you have a drawer or a box overflowing with fabric scraps? Well here’s a quick and easy scrap buster!
2019 saw me sewing these little guys constantly, I created the pattern exclusively and now I’d love to share it with everyone else and see my Micros head out into the world.
What you will need:
- 2x rectangles of PUL measuring 30cm x 15cm and 20cm x 6.5cm (other fabric bases are fine too). Zip and Pull (approx. 15cm in length)
- Matching thread
- Sewing Needle appropriate for the base you decide on
- Ruler
- Marking pencil
- Wonderclips


How To Make the Miccy’s Micro:
Take the smaller rectangle, this will be the handle. Fold over one short side 10mm and clip down. Fold over the full length of one of the long sides over 10mm and clip in place. Then fold the other long side over 10mm and match up with the already folded side, and use the clips to hold it all in place. This will create a handle with only the bottom edge being raw. Sew along the 3 folded edges. Put handle aside.


Separate the zip teeth into two pieces, make sure the pull isn’t attached as well. Clip the zip onto the large rectangle at each short end. Make sure the zip is facing down (good sides together). Straight stitch with a normal foot, down one side close to the edge. Repeat with the other piece of zip. Finish off with top stitching by folding the zip back so that the PUL is flush with the zip teeth, using a zipper foot sew along to hold this in place.


Feed the zip pull onto the zip tape by gently feeding each side into the pull, give it a little tug and it should feed easily back on. (Work from the right side of the bag). Slide the zip pull all the way off to close the thread completely. Then feed the zip pull on again and leave it approximately in the middle.


Flip the bag inside out (good sides together) and feed the handle in above the zip, clip in place. Sew down the raw side of the handle to the bag, then sew down each side of the zip to prevent the pull sliding off, feed the handle through a small opening in the zip to stop it from being caught up in the stitching.


Overlock down each side and using a looper, pull the overlocker threads back in on themselves. Sew down over the zip ends again for extra strength.


Fold the bag so that the bottom two corners create a triangle shape. Clip-in place. From the tip of the triangle, measure down 25mm on each side. Mark. Draw a line to join the two marks. Making sure the triangles are separate, sew along the line to create a boxed bottom of the bag.


Flip the bag back to the right side and add snaps on the handle. And that’s it! Such a simple sew BUT the absolute perfect little bag to stash away those things that would normally get lost in your handbag, backpack or for the little toys that are forever missing.

