

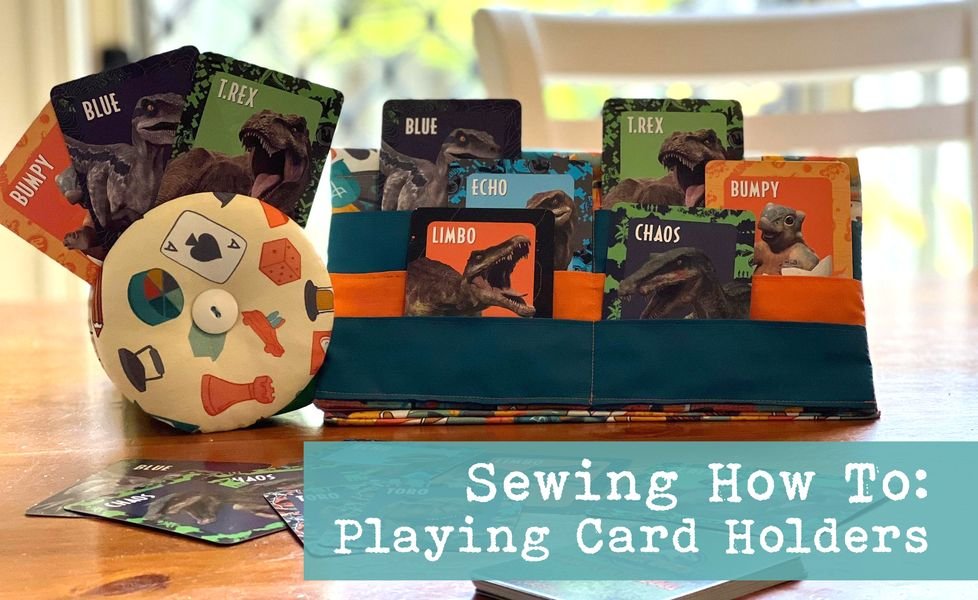
Playing Card Holders
Sew Along With Us

I can’t be the only one who grew up playing card games or board games that required a hand full of cards? I can’t wait to be able to play cards with my kids, and I know my son really wants to play but struggles with holding a full hand and the whole not showing anyone your cards thing. So when I stumbled across one of these at a local market, I knew I just had to make some for myself (ie Mr 5). After a quick search for instructions on how to make it, I decided why not put it all together along with another amazing card holder shared to me by a friend. So here we go!


CD Card Holder:
What you need:
2x CDs (remember those? I dug in our bookshelves for some old gaming discs, otherwise hit up your OP shops if you’re not one to stash outdated media) 2x buttons (make sure these are bigger than the hole in the middle of the CD Fabric (I used twill) Wadding Thread


How to make it:
- Trace the CD onto the twill, then add roughly 2cm to that to create a bigger circle
- Now you can either do this by hand or on the sewing machine. I did it on the machine cause it’s quicker (I’m all about a quick project). So if you’re doing it on the sewing machine, make sure you have a long stitch and DO NOT back stitch at the start or end. But you will just need to stitch all the way around the outside of the single piece of fabric. Do this for both pieces. If you are doing it by hand, you will need to stitch a gathering stitch the entire way around the outside of the fabric.
- Gently tug on each of your threads to gather the fabric slightly
- Pop the wadding into the gathered fabric, and then place the CD in. It should look something like this:


- Continue to tug on the threads until it is all tight and in place. Tie off the ends so that it doesn’t loosen over time.
- Repeat this with the second piece of fabric and CD


- Once you have two padded CDs, place them together with the CDs facing (you should only see your fabric at this point. And it’ll all look like a strange sandwich.
- Take your buttons and attach through all of the layers of the holder through the centre of the CDs. Make sure they are attached nice and tight.
So next up we have the “Card Kitty” or as Mr 5 calls it the “Card Holderer”
This was the one sent to me by my dear friend Kiera and it comes from Sewcanshe.com. But mine is below, with metric measurements and lots of muddled sewing (and a laughable final product cause I didn’t measure right from the start). But you should have a lot more success than me!

What you need:
FABRIC: 1x 45cm x 30cm rectangle for the front 1x 45cm x 30cm rectangle for the back (can be the same fabric or something else) 3x 10cm x 30cm rectangles for the pockets (contrasting print or colour) 3x 28cm x 13cm rectangles of super stiff interfacing (or upcycle and use the plastic bases of three reusable supermarket shopping bags)
27cm 2cm wide Velcro / hook and loop
How to make it:
- Take each of the 3x pocket strips, fold right sides facing, long sides touching and sew
- Turn your pockets right sides out, and press them flat
- Top stitch along folded edge of each pocket piece

- Take your front piece and mark 3.5cm one of the short edges. The Velcro will go here. Mark a line 13.5cm from this line and mark another 13.5cm from this line. Note: If your fabric is directional, you’ll want to start marking from the bottom short edge.
- Leaving the 3.5cm section for the velcro. You will need to attach all 3 pockets to that first 3rd of the body piece. Mark a line 2cm down from your second line and pin your first pocket with top stitched edge along this line. Sew along the bottom of your first pocket to secure.
- Mark a line 3.5cm down from the bottom edge of your first pocket, line up the non top stitched edge of your second pocket. Pin or clip in place and sew along the bottom edge to secure.
- Mark another line 3.5cm down from your second pocket, line up the bottom edge of your pocket, pin or clip in place and sew down along bottom edge to secure. This line should be very close or on top of your Velcro line, but not past it.
- Baste the edges of your pockets down a very small (5mm or so) distance from the edge to prevent them from moving around later

- Measure and mark the halfway line on your pockets. Sew along this line, turning your three pockets into six.
- Lay the piece for the back of your card holder on top of the front, right sides touching and pin or clip around three sides, leaving the Velcro end open. Sew around these three sides using a 1cm seam allowance. Don’t forget to back stitch.
- Carefully trim the corners to reduce bulk, and turn your card holder right sides out.
- Put your first piece of interfacing into your holder all the way to the bottom and make sure it’s a good fit. If it’s too snug, not laying flat / pulling on your seams, or right up on your sew line, pull it out and trim a scant 1 or 2mm off, and try again for fit
- Sew along your marked line to keep your interfacing in place.
- Repeat these steps for the second and third sections, sewing the last piece in place along the 3.5cm line.

- Fold in your open edges, press flat if desired, and sew to close the holder.
- Pocket side up, centre one side of the Velcro along the edge, pin or clip, and sew in place

- Centre the other piece of Velcro along the top edge of the back side about 5mm in, pin or clip and sew in place. You may need to take it slowly, depending on how well your machine tolerates the material you’ve used for interfacing.
- And you’re done!
