

Breast Cancer Sews
Sew Along With Us


As many of you would already know, my mum was diagnosed with breast cancer last year. One of the first things I did when we found out was begin researching what I could do, make or give mum to make the whole thing a touch easier.
Two things I came across were the head turban and the heart cushion.
Mum loved both, and to this day, 12 months later, she is still using the heart cushion daily.
DOWNLOAD THE PATTERNS HERE
Did you know that any of the fabrics purchased from our Charity Print categories on the website will have their Cloth Cuts profits donated directly to that charity?
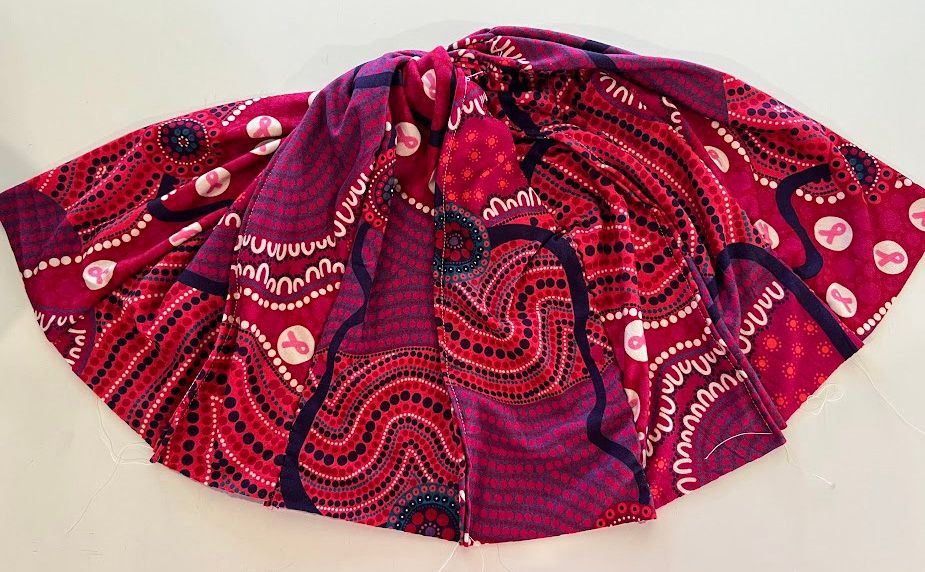
Print used in this tutorial : Bagaraybang Ngamung by Brooke Perry Indigenous Artist
Heart Pillow
The heart shape is ideal for use as an underarm pillow to protect sensitive spots after a mastectomy or lump removal. It can also be used in the car to protect the chest from seatbelts.
I originally found this pattern online at See Kate Sew and wanted to offer it along with my own tutorial to you.
What you need:
- Fabric (I used Cotton Lycra and Bamboo Lycra for my sews as I wanted them super soft and cuddly)
- Poly-fill (I used a pair of pillows from Kmart for $5, ripped them open and used the stuffing)
- Sewing Machine
- Needle and thread
- And of course the pattern for this cushion
How to Make it:
Using the pattern, cut out 2 heart shapes on your fabric.

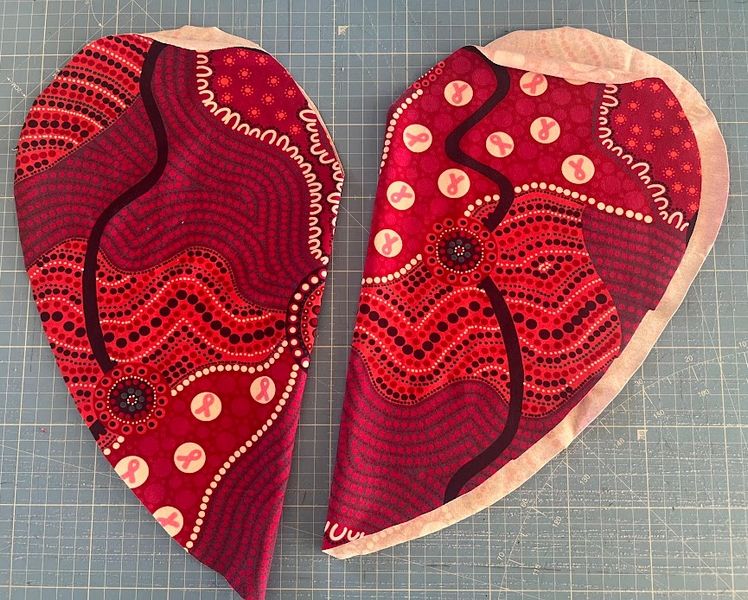
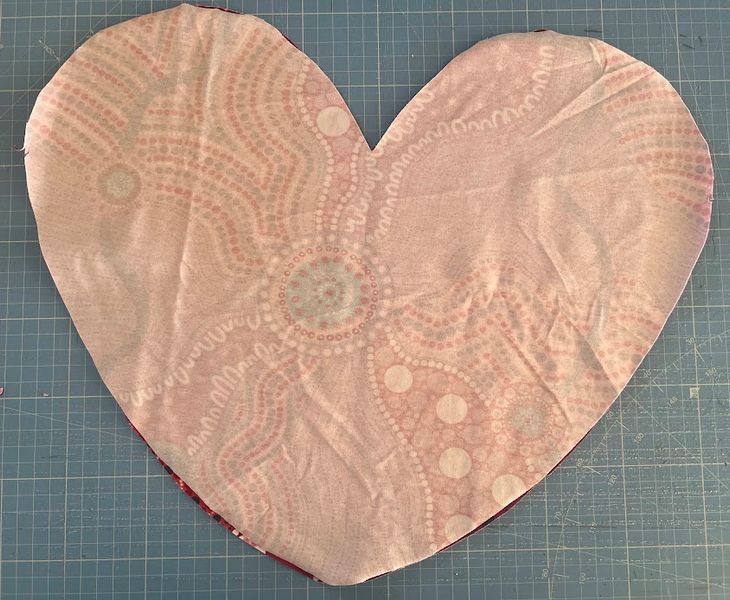
Lay them right sides together and sew around the outside leaving a gap in your sewing to turn them the right way around. And of course, once you have finished your sew, feed it through so that you have a big colourful heart.


Stuff that heart full of your stuffing, get it to whatever squishiness you want.


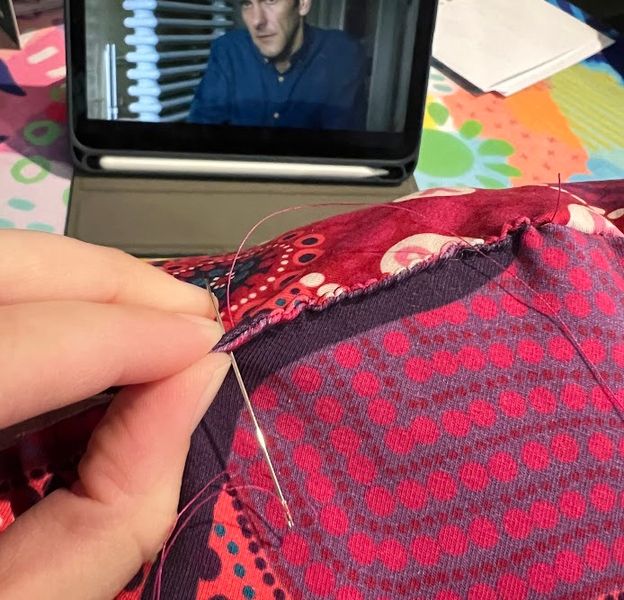
Then hand stitch the opening close.

And that's it! Super simple but such a helpful item post mastectomy


Head Turban
Then when it came time for mum to start chemo, I sought out the help of another amazing woman who has fought breast cancer. She recommended a turban, which with a bit of fiddling I was able to make my own turban design.
We used Bamboo Lycra for these and Mum kept commenting on how ridiculously soft it was, especially as she was going through everything else, having a soft and comfortable turban was a little bonus.
Then when we was finished with her treatment and her hair began to grow back, she was able to pass on some turbans to other women going through chemo too. (Plus she had spotted turbans similar in shops selling for $30+ so being able to gift them was good)
What you need:
- Bamboo Lycra
- Sewing Machine
- Pins
- Needle and Thread
- Sewing Pattern
How to make it:
This pattern is a little trickier, with a couple more steps than the last one BUT with some patience and hopefully some okay explaining on my end, we can get there together.
Start with 2 rectangles cut out of your bamboo lycra (make sure they have been cut on the fold as per the instructions)


Then sew down the long side on each piece (with the right sides together) making a long tube. Flip the tube right side out, and lay it so that the seam is in the centre when laid on a table.


Find the middle of your two pieces, and sew a gathering stitch down from the top of one, all the way to the bottom of the second one. Join the two into the one stitch line - don't cut the thread inbetween them.
Pull the long thread tails to gather the centre.


Flip over the turban so that the seams are now face down.


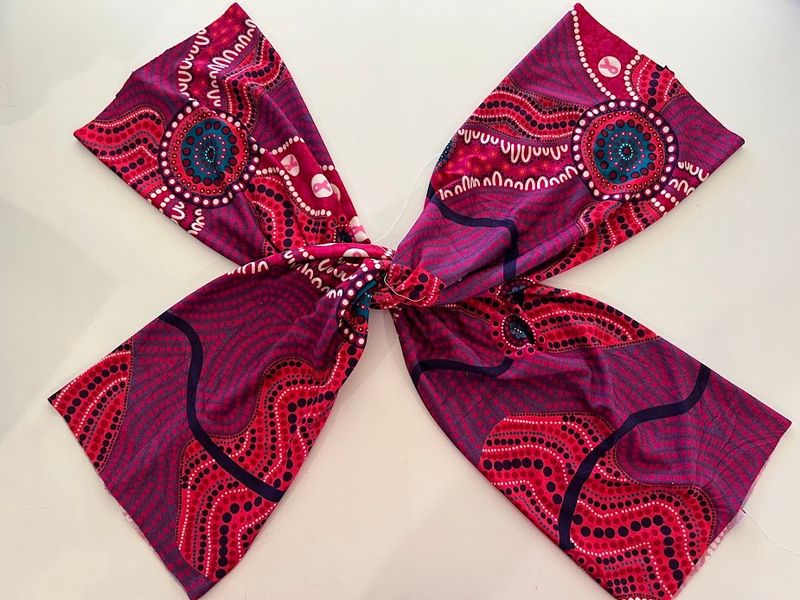
Maneuver the arms of the fabric so that they look like this.

Then rotate the whole thing 90 degrees to the left (i forgot to take a photo of this step sorry!)
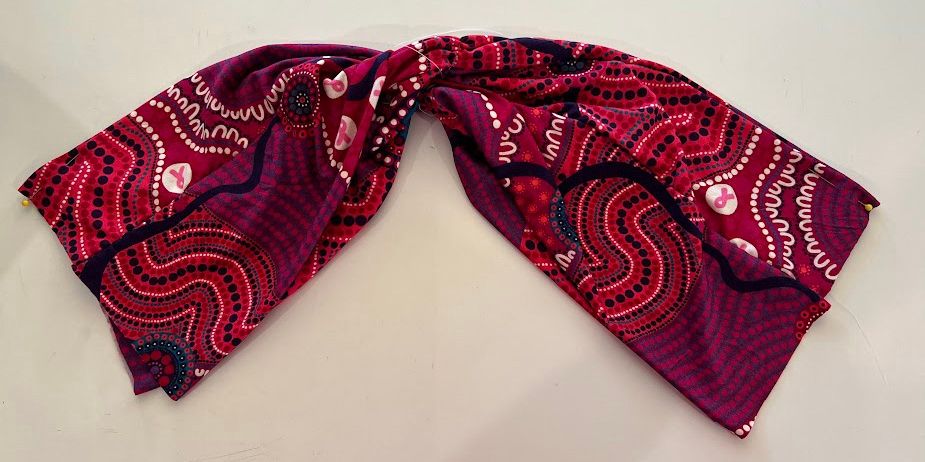
Next you want to take the top two corners and fold it down to sit on the very bottom two corners (like a big mirror image). You will end up with just one piece laying on top of the other, with the twisted part in the middle still. Now you will need to pin the NEW top corners.

Open it up, leaving the pins in place.

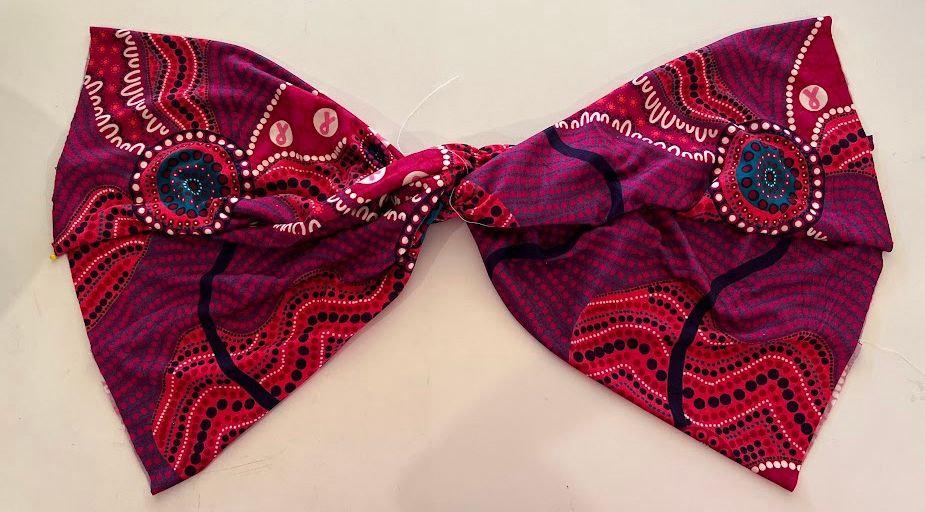
Now take the two not pinned corners on the right, and fold it over so they sit on the same corners on the left. again like a mirror image. Pin the very top corner (but leave the bottom corner with no pin.

Starting from the outer edges of each pinned corner, you will need to sew along the edge into the centre near the twisted section. Get as close as you can to the twist. Do this for each pinned section


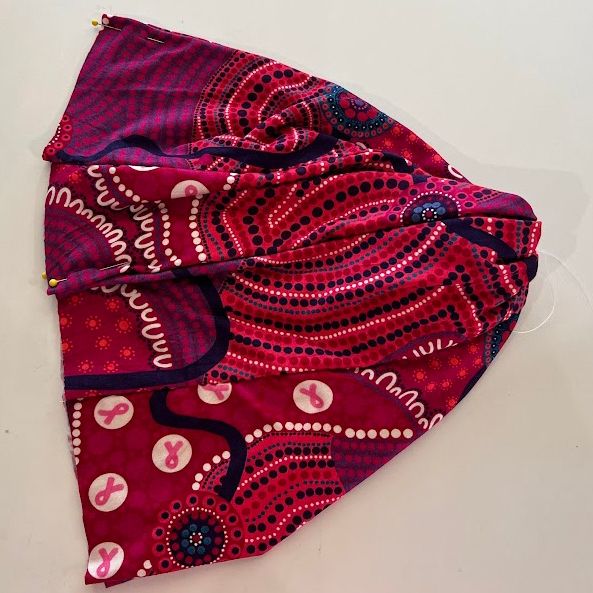
With the turban folded in half so that the raw edges are together, clip in place as shown.


Hand sewing now, you will need to do a long stitch on the raw edges side. Pulling tight as you go to gather the fabric.


Once it is gathered, sew with the sewing machine along the gathering. This will secure it in place. You may need to sew over it a couple of times just to be on the safe side.


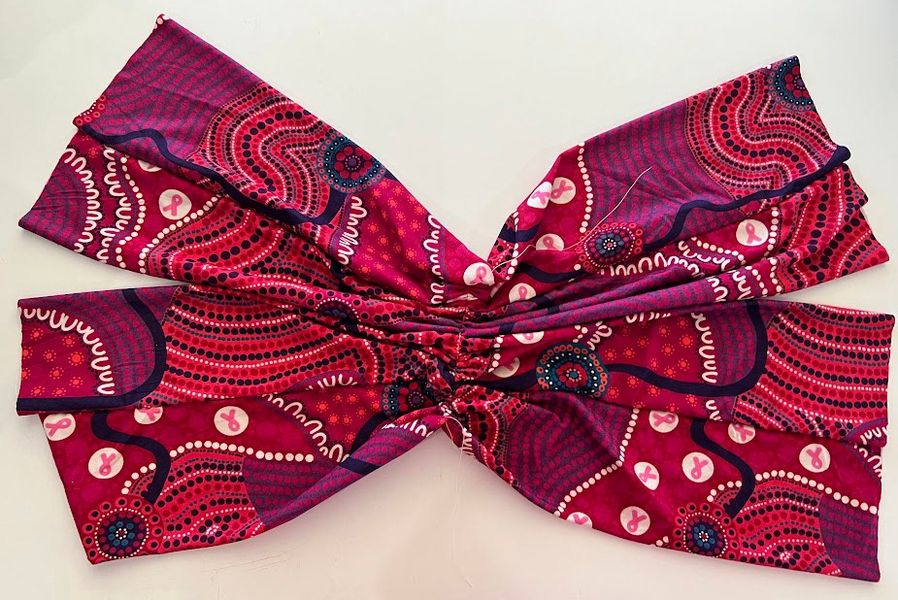
And that's it, you should be right to flip the turban around now and have your very own, super soft, head turban! Yay!


